



Sourdough bread
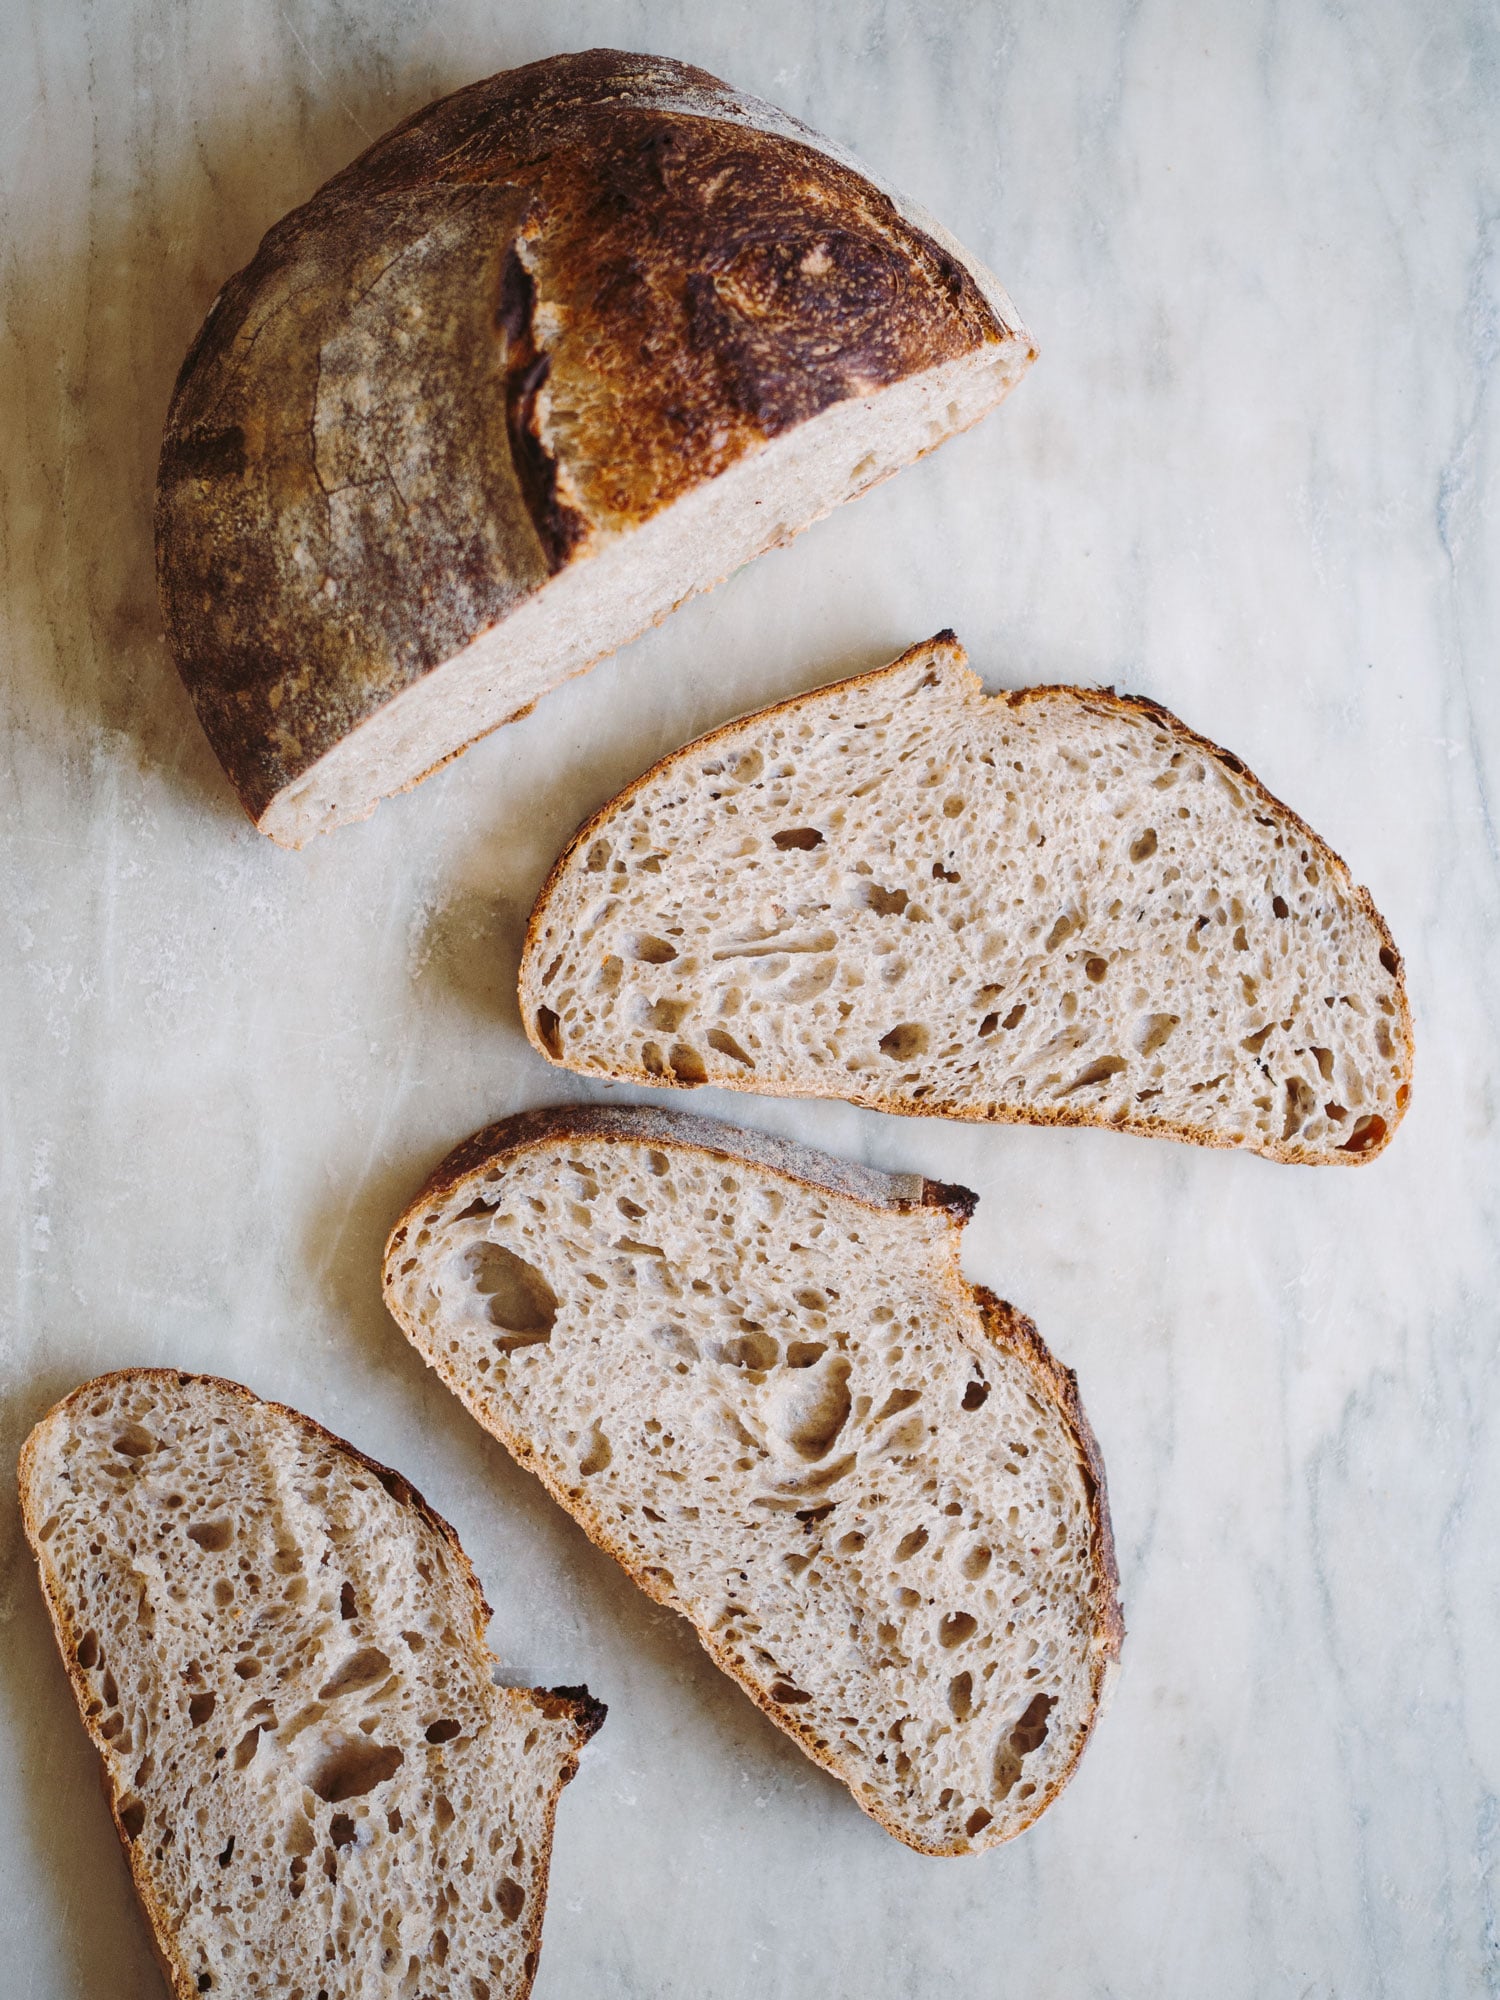


Beginner's guide to sourdough bread without yeast
Sourdough bread is both simple and a whole science! The bread consists of flour, water and salt, but there are all sorts of techniques, tools and processes that are worth getting to know if you want to bake good sourdough bread.
TIP: Also try this recipe: rye bread with sourdough or a nice one Farmer's bread without grains.

Tools for sourdough baking
Let's first take a look at what tools you can use. can use to bake a sourdough bread. With press "can", because you can easily make a nice sourdough bread with just a bowl, a tea towel and an oven. If you just want a beautiful bread with the perfect crumbly and crispy crust, like the ones you see on Instagram, it's a good idea to get some different tools. This makes both the process easier and the success rate better. If you're completely new to sourdough baking, you can start by trying this recipe for sourdough buns, that can be made without any tools. Once you have gained a little more experience with bread baking, you can try different types of flour and flavors. For example, try this incredibly delicious walnut bread with Åland wheat flour.
To knead, fold, shape and rise the dough, you can use the following:
- Stirring machine: With a mixer, you can knead the dough together so that the gluten network develops optimally, without having to work with the dough during rising. If you don't have a mixer, you will need to fold the dough while it ferments and rises. This is described in one of the following sections.
- Bowl: The dough is stirred and kneaded together in a bowl, and it can also rise in a bowl if you don't have a bucket.
- Transparent plastic bucket: It's smart to let the dough rise in a so-called "condi bucket", which is a transparent plastic bucket with a lid. This makes it easy to fold the dough, and you can easily keep track of how much the dough has risen. If you don't have a condi bucket, you can use another plastic bucket that can hold about 3 liters. And as I said, you can always let the dough rise in a bowl if you don't have a bucket.
- Table scraper/dough cutter/dough spatula: This is a simple but extremely handy tool when handling dough. You can use it to shape and stretch the dough or to "chop" it into buns. Alternatively, you can use a knife to cut the dough and your fingers to shape it.
- Lifting basket: A proofing basket is designed to support bread dough while it rises. They come in both round and oblong shapes, and both work well. Alternatively, you can use a regular bowl lined with a tea towel. Use a bowl that is a bit "flat" if you have one, so the dough can rise better. A regular magret bowl will also work.
- Rice flour: Rice flour is used to sprinkle in the proofing basket or on the tea towel to prevent the dough from sticking. Rice flour does not contain gluten, so the dough does not stick as easily. You can use wheat flour instead if necessary, but rice flour works best, and you use very small amounts for each loaf, so a single bag goes a long way.
- Olive oil: Feel free to use olive oil to grease your pastry bag so that the dough doesn't stick to the sides during the folding. You can easily use other types of oil as an alternative.
To slice and bake the bread, you can use the following:
- A scoring knife/dough cutter: Before baking, the dough is scratched so that you can control where it cracks and thus rises. You can buy a special tool for this, but you can also use an incredibly sharp knife or a razor blade.
- Cast iron pot or frying pan: It clearly gives the best results to bake the bread in a cast iron pan or similar. This creates steam and constant heat, which ensures that the bread develops best and does not "flatten out" during baking.
- Back steel: If you don't have a pan or roasting pan, you can bake the bread on a baking sheet/baking stone. This ensures a more constant heat in the oven, and when the bread comes onto the hot surface, it can rise better. If you don't have a baking sheet either, you can bake an excellent loaf on a regular baking sheet. Remember to preheat the baking sheet and follow the instructions in the recipe on how to create steam in the oven.


Ingredients for sourdough bread
Now let's take a look at what ingredients you need to bake the best bread. To bake a sourdough bread, you will basically need the following ingredients:
- Sourdough
- Flour
- Water
- salt
It's super simple, but both the quality and quantity of the four components are crucial to the result.
Active sourdough
First of all, you need an active sourdough. You can find a guide to starting sourdough here. When you want to bake without yeast, your sourdough must be active. This means that you cannot take it straight from the refrigerator and use the sourdough in a loaf of bread. On the other hand, you must make sure that it is fresh and "freshly fed" so that it can rise to double its size in 2-4 hours. If the sourdough has been in the refrigerator, take it out and feed it the day before if you want to use the sourdough for baking. Mix 50 g of old sourdough, 50 g of water and 50 g of flour, and then keep an eye on how quickly the sourdough rises. If the sourdough rises to double its size within a maximum of 6 hours, you know that you can use it to make your starter/young sourdough that will go into the bread. If the sourdough rises more slowly, feed it again to make the sourdough more active.
TIP: Use your sourdough leftovers from feedings to make food pancakes or crispbread.
Flour for sourdough bread
When baking sourdough bread, the protein content of the flour is particularly important. The protein content of flour is gluten, and we want a high gluten content, as this is what gives the bread a light texture with nice air holes. A lower gluten content therefore results in a less compact bread. The gluten content is highest in finely sifted rolled flour, which consists almost entirely of gluten and starch, and it therefore has very good baking properties. Coarser flours, which contain germ and bran, are added to the bread to provide flavour and nutrition. This recipe uses 450 g of finely rolled wheat flour and 50 g of wholemeal flour. This gives a dough with good baking properties that is easy to work with, but you still get the flavour and nutrition from the wholemeal flour. You can vary the exact flour you choose to use, as long as you maintain the proportions. As you gain more experience with sourdough baking, you can try using a larger amount of whole grains or replacing some of the fine-grained flour with stone-ground flour. However, it can make the dough more difficult to handle, as there is not as much gluten in coarser flour types.
Finely sifted rolled wheat flour
This is also what most people would call a "regular wheat flour". Here you should look for a flour that has a protein content of over 12%, so that your dough can develop a good gluten network. Once you have tried baking the bread a few times, you can experiment with replacing up to half of the fine rolled wheat flour with stone ground flour, finely sifted Åland wheat flour or similar.
Wholemeal flour
Whole grain flour is flour that contains germ and bran. And good nutrition and taste. It tastes good to use whole grain rye flour or whole grain Ølandswhede flour. You can also use whole grain spelt or emmer flour. The germ and bran that whole grain flour contains absorb a lot of liquid. If you use a larger proportion of whole grain flour than the 50 grams, you may therefore need to increase the amount of water. Here you can try adding 20-50 grams of extra water when you knead the dough after the autolysis, if you find that it can absorb a little more liquid. 
Hydration: The amount of water in sourdough bread
Another important ingredient in your sourdough bread is water, and here two things are important: temperature and quantity. The warmer the temperature, the faster the sourdough will develop. However, if the water is too hot, it can have the opposite effect. Therefore, strive for lukewarm water that is just below 30 degrees. The amount of liquid in a sourdough bread is calculated in percentages, which are called hydration. For example, if you bake a loaf of bread with 1000 grams of flour and use 500 grams of water, the hydration is 50%. The higher the hydration, the juicier and airier the crumb you will get - but the dough will also be more difficult to handle, because the dough is more liquid and sticky. Anything over 70% will give a sourdough bread with good hydration. However, if you also use whole grains and a good amount of salt in the recipe, most people will be able to handle a dough with a slightly higher hydration. Both salt and whole grains allow the dough to absorb more liquid.
Sourdough bread with 75% hydration
This recipe uses 500 grams of flour and 375 grams of water. This gives a hydration of 75%, which is relatively high, but since you add both whole grains and a good amount of salt, the dough becomes manageable, even if kneaded without a mixer. If you find that the dough is too difficult to work with, you can reduce the amount of water to 325-350 grams of water, so you get a hydration of 65%-70%. This will certainly also give you a nice bread, and you can always practice increasing the hydration as you gain more experience with handling bread dough.
Salt
Salt gives your baked goods a good flavor, and it also helps to retain the liquid in the bread. If you use a few grams less or more, it can affect the consistency of your dough and the final bread. It is therefore important that you do not just add salt at random but weigh the amount. You can use all types of salt. 

Prepare your sourdough for baking
When you are ready to bake your sourdough, it needs to be fed. In this way, you transform a so-called "mature sourdough" into a "young sourdough". This is also called making a "starter". When a sourdough is fed with flour and water, it will begin to rise. Typically, it will rise by at least 50% - often more if you have a good, active sourdough. A sourdough is best suited for baking, right around the time it "peaks". That is, the time when the sourdough has risen to its maximum after feeding, before it starts to collapse again. You can keep an eye on how much the young sourdough/starter has risen by putting an elastic band around the glass. Around the time when the sourdough has risen by 50% (to double in size), you use it in the bread dough. At this point, it will be active and ready for baking.
Sourdough test
If you want to be sure that your young sourdough is ready for baking, you can do a sourdough test: Take warm water (about 30 degrees) in a glass, and carefully add a tablespoon of sourdough to the water. If the sourdough floats on the surface of the water, it is active. If it does not float, the sourdough typically needs to stand for another hour before you use it in the bread.
Sourdough timing
How quickly your sourdough rises depends on how much flour and water you feed it. The more sourdough to water and flour, the faster it will rise. You can use this knowledge to plan your sourdough baking. You can feed your sourdough so that it is approximately ready when you want to bake. This recipe specifies two different feedings:
- Young sourdough ready in 2-4 hours
- Young sourdough ready in 8-10 hours
If you want to mix a dough as quickly as possible, you can feed your sourdough with the specified amounts so that it is ready for baking after 2-4 hours. If, on the other hand, you want to mix the dough in the morning, you can feed the sourdough with the specified amounts of flour and water so that it is ready after 8-10 hours. You can also use this if you mix the dough in the morning and want the sourdough to be ready for baking when you get home from work. Once you have tried baking with your sourdough a few times, you will know approximately how long it takes for it to rise. The hours given are only a guide, as it depends on your sourdough and the conditions (especially the temperature) in your kitchen. 
Autolysis
As soon as flour and water are mixed together - before you start kneading - the gluten network begins to develop in your dough. This is called autolysis. When you use autolysis, you don't have to knead the dough nearly as long to get a dough with a good gluten network that can make the dough rise well. In a very practical way, you stir together flour, water and sourdough (some people only add the sourdough later) and let it stand for 30 minutes to several hours. When you then start working with your dough, you will find that the flour has already absorbed the liquid, and the dough quickly becomes pliable. NOTE: Remember that you must not add salt during autolysis, as it prevents the gluten network from developing optimally.  Dough before autolysis
 Dough after autolysis
 Dough after kneading
Kneading or folding
To develop a good gluten network and incorporate the water into your dough, the dough must either be kneaded in a mixer or folded.
Kneading on a mixer
You can easily knead the dough in a mixer so that the gluten lines become long and elastic. However, it is important that you neither knead your dough too much nor too little. If the dough is kneaded too little and the gluten network is not well developed, the dough will be difficult to work with and it will not be able to rise optimally. However, if you knead the dough too much, the gluten network will "burst" so that the dough can no longer hold liquid. The consistency will be almost like sticky wallpaper paste. Your dough is kneaded perfectly when it has a smooth, shiny surface and releases the edges of the bowl. If you take some of the dough and stretch it between your fingers, you can pull the dough out into a very thin and transparent "window". This is called a gluten test, and is a sign that the gluten network is well developed.
Stretch and fold
If you don't have a mixer, you can develop a gluten network in your dough by stretching and folding the dough while it rises. This is done by stretching the dough and folding it over itself. This way you work with the gluten in the dough, and the dough will become stronger and more elastic. There are several different ways to stretch and fold. In the recipe you can see two different techniques that you can alternate between. You can use whichever technique you prefer.  Before the first fold
 After the first fold
 Before the second fold
 After the second fold
 Before the third fold
 After the third fold
 Before the fourth fold
 After the fourth fold
Fermentation
After you have kneaded the dough in a mixer, it must stand and ferment/rise so that the sourdough can do its work. The dough must rise approximately 20-40%, and this typically happens within 2-4 hours. That is why 3 hours is given as a guide for rising time in this recipe. If you stretch and fold your dough, this happens while the dough ferments and rises. Here you spend the first 1.5 hours of the rising time on stretching and folding, and then the dough stands and takes care of itself for 1.5 hours. Even though you work with the dough, you will find that it becomes more and more airy with each stretch and fold. 
Preshape & shape
When the dough has risen by 20-40% it is time to shape it. This is called "shaping". To shape, you typically use a dough spatula, which makes it easier to push the dough without it breaking. However, you can also use your fingers, as shown in the video in the recipe. Preshape: First, you make a "preshape", where the dough is turned out onto the table and lightly stretched into a ball. Then the dough must rest for half an hour before you make the "shape". During this resting time, the dough will get a slightly dry surface, so you can work with it more easily. And it also allows the dough to "relax" before we continue working with it again. Shape: When you "shape" your bread, you gently pull it out into a rectangle before folding it over itself - almost like folding a t-shirt. We do this so that the dough will rise better with a more even distribution of air holes. 
Rest and cool down
Once your dough is "shaped", transfer it to a container where it can rest overnight in the refrigerator. Here I use a proofing basket, but you can also use a regular bowl covered with a tea towel. While your dough rests in the refrigerator for 12-24 hours, it will continue to develop. The longer it sits, the more sour the bread will taste, and the crispier and caramelized the surface will be. Once the dough is in the refrigerator, you don't count hours. A few hours or so won't make much difference.
Scratching
Before the dough goes into the oven, you score the bread to (try to) control how the bread rises. You want the bread to have a nice "oven spring" - that is, that the bread almost jumps up when it goes into the hot oven. That's why we cut the bread so that the dough can rise without having to break through the crust. You can score all sorts of patterns in the bread, but start with the very simple one: A long cut across the bread. Hold your cutting tool or knife slightly at an angle, and cut 0.5 - 1 cm into the bread. That way, you will give the bread good conditions to develop in the oven, and the bread will get a nice "ear" when baking. 
Baking
When baking bread, we want two things to happen: First the bread to rise, and then it to have a golden and crispy crust. If the crust sets too quickly, there is a risk that the bread will not rise enough. That is why we first bake the bread at a lower heat and with steam, before turning up the temperature and forming the crust. It is good to bake your bread in a pan. The pan will generate steam, so the bread can rise nicely before you remove the lid and the bread is finished baking. If you do not have a cast iron pan, you can easily bake your bread without it (preferably on a baking sheet). Here, however, you need to add extra steam to the oven, and this is done by pouring boiling water into a baking pan at the bottom of the oven when you put the bread in. Here, you also need to turn off the oven and leave it for the first 20 minutes. That way, the temperature will not be so high that the crust sets too quickly.After the first 20 minutes, turn the oven on full speed to get a nice, golden and crispy crust. 

Storage
Once your sourdough bread is baked, it's best to wait until it has cooled before cutting it. This will give the bread a better crumb and it will stay moister. You can store it in a paper bag, which will keep it moist for up to 3 days, and if you haven't eaten it by then, it can also easily go in the freezer.
TIP: Use leftover sourdough bread to make crispy croutons.

